Making Fermented Rice Flour Noodles (การทาเส้นขนมจีน ; sen khanohm jeen)
By Hanuman © Thaifoodmaster.com
Private Notes:
You must be a member to use this feature
Ingredients
- rice (ข้าวสารข้าวเจ้า) preferably old rice
- water (น้ำเปล่า)
- sea salt (เกลือทะเล)
ส่วนผสม
- เมล็ดข้าวที่แตกหัก หากเป็นข้าวเก่ายิ่งดี
- น้ำ
- เกลือ
Instructions
- Wash the rice grains
ล้างเมล็ดข้าว
First fermentation (3 days) การหมักครั้งที่หนึ่ง (3 วัน)
- Place the rice grains in an earthenware jar and soak in clean water. Seal the jar with banana leaves, and secure it with a heavy lid.
นำเมล็ดข้าวไปแช่น้ำสะอาดในภาชนะดินเผา จากนั้นนำใบตองมาวางทับและปิดด้วยฝา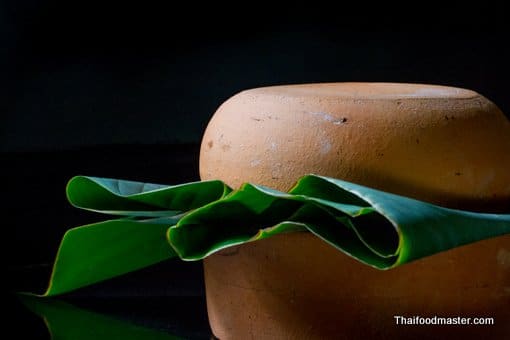
- Change the water daily to prevent a sour odor from accumulating, and mix the rice grains thoroughly to assure uniform fermentation.
เปลี่ยนน้ำทุกวันเพื่อป้องกันการสะสมกลิ่นเปรี้ยวและซาวเมล็ดข้าวให้ทั่วถึงเพื่อให้ได้การหมักที่สม่ำเสมอกัน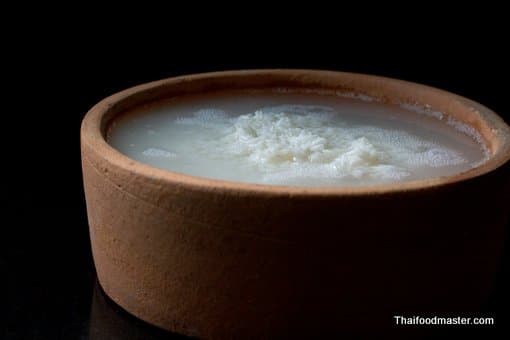
Second fermentation (2 to 3 days)การหมักครั้งที่สอง (2 ถึง 3 วัน)
- Now the rice grains are soft. Wash them thoroughly and replace the first fermentation waters with salt brine. Leave the rice undisturbed to continue the fermentation; the added salt regulates the metabolic process. In Thai, this stage is called gaan naawn naam (การนอนน้ำ), which means "sleeping in the water".
เมื่อครบเวลาหมักในครั้งแรก เมล็ดข้าวจะอ่อนนุ่มขึ้น ล้างเมล็ดข้าวจนสะอาดและแช่ต่อในน้ำเกลือเนื่องจากเกลือจะช่วยปรับกระบวนการย่อยของแป้งให้เป็นปกติ จากนั้นปล่อยเมล็ดข้าวหมักต่อโดยไม่ต้องทำอะไร โดยขั้นตอนนี้เรียกว่า “การนอนน้ำ”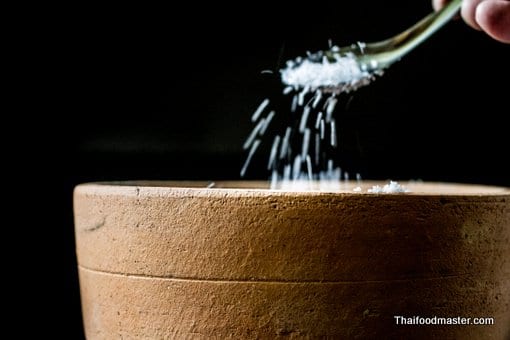
Grinding the rice grains and collecting the starchการโม่แป้ง
- In the old days manual stone mills were used for this task. I use a combination of a blender and an electric slow juicer to grind the rice and produce the starch. Add water as needed.
ในอดีต คนไทยใช้หินโม่แป้งในขั้นตอนนี้ แต่สำหรับผมเลือกใช้เครื่องบดร่วมกับเครื่องค้นแยกกากในการบดเมล็ดข้าวจนได้เนื้อแป้งเปียก สามารถเติมน้ำได้ตามความจำเป็น
- Let the starch mixture rest overnight so the starch particles can settle.
จากนั้นทิ้งแป้งที่ได้ไว้ข้ามคืนเพื่อให้อนุภาคของแป้งคืนตัว
Drying the starch and third fermentation (2 days)การทำแป้งให้แห้งและการหมักครั้งที่สาม (2 วัน)
- Transfer the wet starch milk into a clean cheesecloth.
เทแป้งเปียกลงในผ้าขาวบาง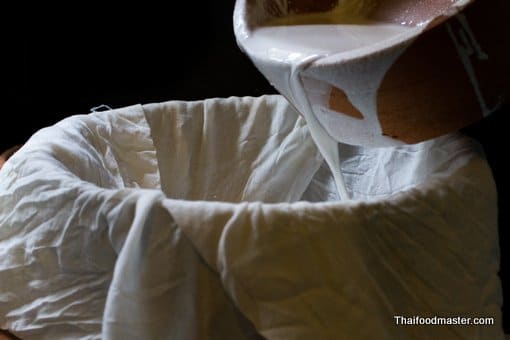
- Tie up the cloth into a sack using a string or a wire.
ใช้เชือกหรือลวดมัดปากถุงผ้า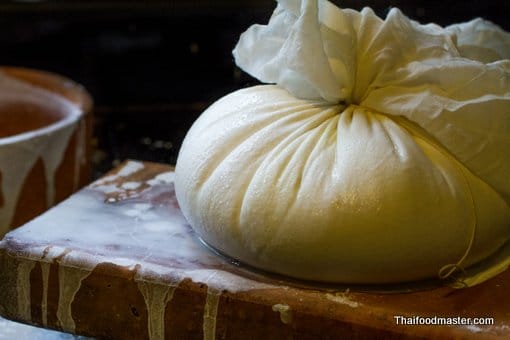
- Place a heavy weight on top of the sack, and leave for 2 days. This will squeeze out all the water, and will allow the starch to complete the third phase of fermentation.
ใช้หินหรือวัตถุที่หนักวางทับถุงแป้งเป็นเวลา 2 วัน วิธีการนี้เป็นการบีบน้ำทั้งหมดออกจากตัวแป้งและช่วยให้แป้งได้หมักตัวอย่างสมบูรณ์ในการหมักครั้งที่สามนี้
Steaming (Partial Gelatinisation) การนึ่ง (การเจลาติไนซ์บางส่วน
- The fermented starch is now ready: it has a pleasant nutty-sour smell, and a nice off-white color.
ตอนนี้แป้งหมักมีกลิ่นอมเปรี้ยวชวนรับประทานและมีสีขาวสวยงาม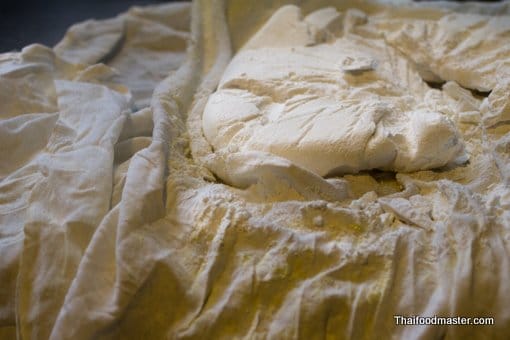
- Gradually add hot water, and knead with your hands until the dough reaches a consistency where you can shape it into a ball without it sticking to your hands.
ค่อยๆเติมน้ำร้อนและใช้มือของคุณนวดแป้งจนแป้งเข้ากันและสามารถปั้นเป็นก้อนกลมได้โดยไม่ติดมือ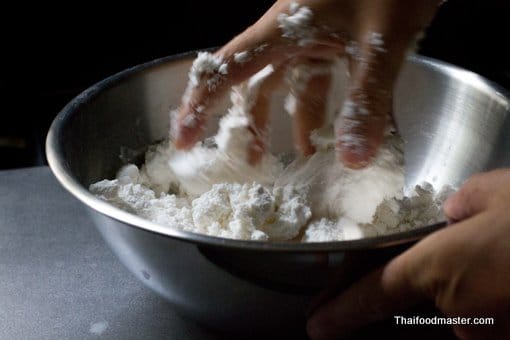
- Shape the dough into a 15 cm ball. In Thai, this stage is called gaan kheun ruup bpaaeng (การขึ้นรูปแป้ง)
ปั้นแป้งเป็นก้อนกลมขนาด 15 ซม. ขั้นตอนนี้เรียกว่า “การขึ้นรูปแป้ง”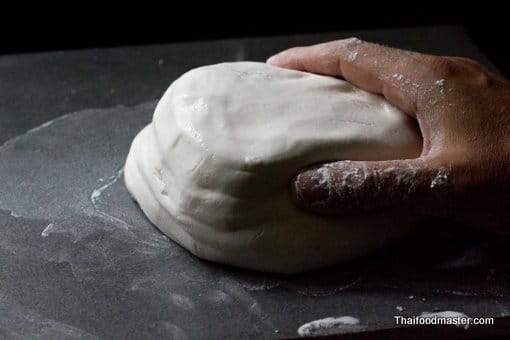
- Wrap the dough in a clean cheesecloth.
ใช้ผ้าขาวบางห่อตัวแป้ง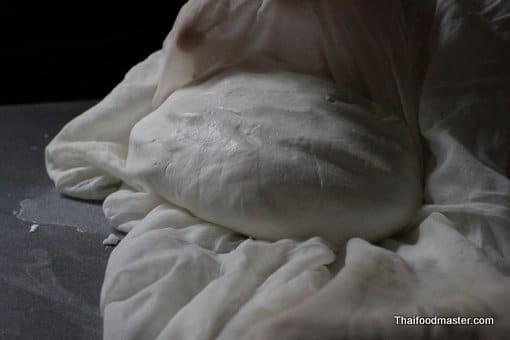
- Prepare your steamer on high heat; steam the dough balls for about 4-5 minutes. You may boil them instead for the same results.
เตรียมลังถึงโดยใช้ไฟแรง จากนั้นนึ่งแป้งเป็นเวลา 4-5 นาที คุณอาจเลือกต้มแป้งได้เช่นกันเพราะได้ผลไม่แตกต่างกัน
- Remove from the heat
ปิดไฟ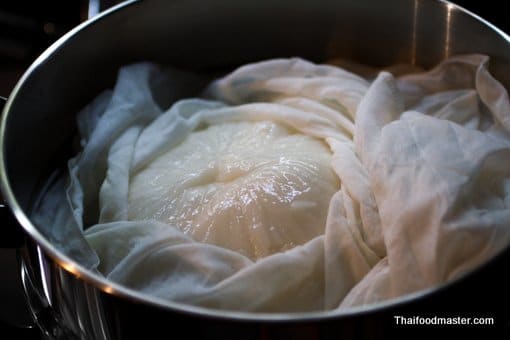
- Use a spoon to check the thickness of the cooked dough.
ใช้ช้อนตรวจสอบความหนาของก้อนแป้งที่นึ่ง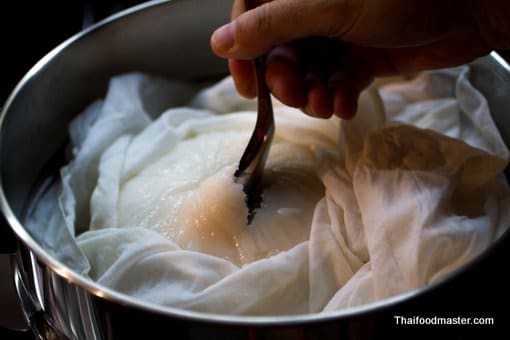
- The rule of thumb is that about 0.5 cm should be cooked (gelatinized).
เนื้อแป้งประมาณ 0.5 ซม. ต้องสุก (การเจลาติไนซ์)
- In the past, a large wooden pestle and mortar were used to mix the cooked and uncooked starch into a homogeneous dough. Rice flour lacks the characteristics of wheat gluten; the gelatinised starch serves as a binding agent that allows to the formation of elastic and stable noodles. You should pound the dough ball while it is still hot from the steamer. In Thai, this stage is called gaan dtam bpaaeng (การตำแป้ง).
ในอดีตมีการใช้สากไม้และครกหินในการผสมแป้งที่สุกและไม่สุกจนเป็นเนื้อเดียวกัน ทั้งนี้ แป้งข้าวเจ้ายังขาดคุณสมบัติบางประการของโปรตีนจากแป้งสาลี และแป้งเจลาติไนซ์ที่ได้จะทำหน้าที่เป็นตัวประสานทำให้ได้เส้นที่มีความยืดหยุ่นและอยู่ตัว คุณควรตำแป้งระหว่างที่แป้งยังร้อนอยู่ ขั้นตอนนี้เรียกว่า "การตำแป้ง"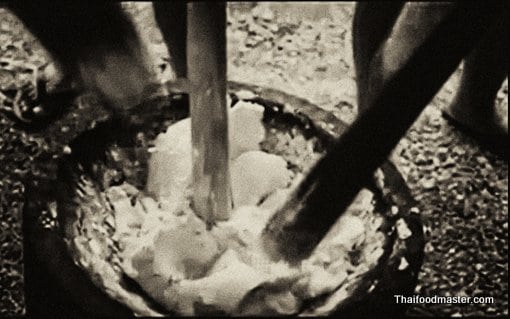
- After the cooked and uncooked starch are combined, add a small amount of hot water while kneading.
หลังจากที่แป้งสุกและไม่สุกผสมเข้ากันดีแล้ว เติมน้ำร้อนเล็กน้อยระหว่างการนวดแป้ง
- Continue kneading the dough with both your hands until you get a soft white cream. In Thai, this stage is called gaan nuaat bpaaeng (การนวดแป้ง).
ใช้สองมือนวดแป้งต่อไปจนได้แป้งสีขาวเนื้อครีมนุ่ม ขั้นตอนนี้เรียกว่า "การนวดแป้ง"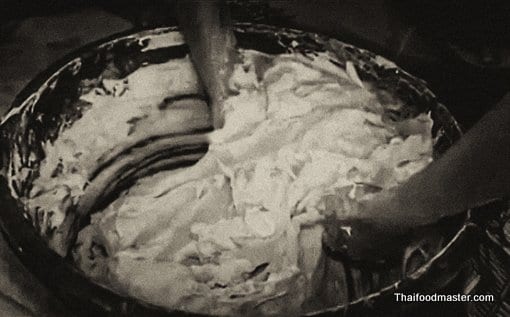
- To save labor, I used an electric mixer with dough hook attachments to beat the dough, and add hot water until the mixture becomes creamy.
เพื่อเป็นการประหยัดแรง ผมเลือกใช้เครื่องผสมไฟฟ้าเพื่อนวดแป้งและเติมน้ำร้อนจนได้แป้งเนื้อครีม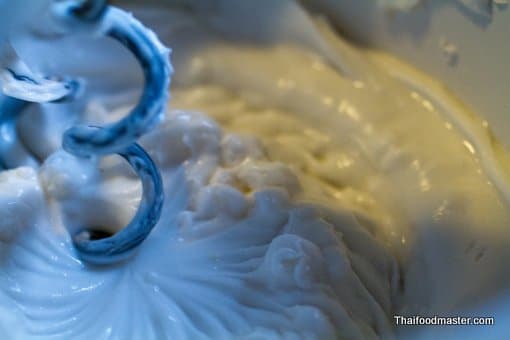
- When the cream is ready, it should stay firm on a spoon and not drip.
หากแป้งติดช้อนไม่หกลงมาถือว่าใช้ได้แล้ว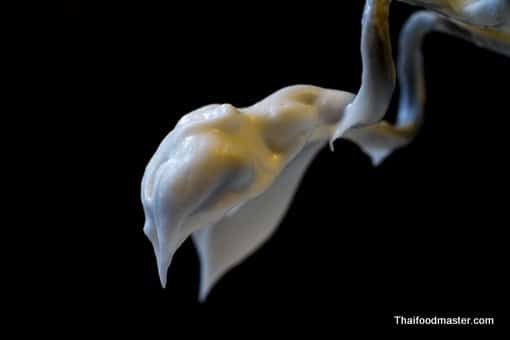
Filtering the starch cream การกรองครีมแป้ง
- Transfer the starch cream to a fine cheesecloth.
นำครีมแป้งมาใส่ในผ้าขาวบาง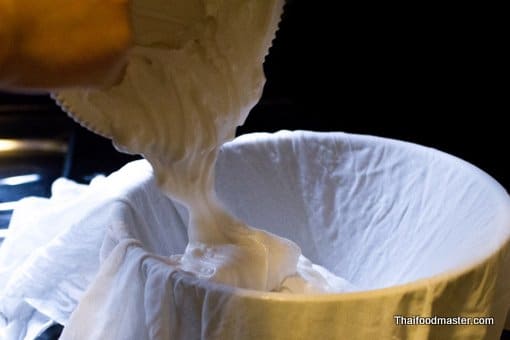
- Using your hand, squeeze the cream through the cloth’s pores.
ใช้มือบีบแป้งให้ลอดผ่านรูของผ้า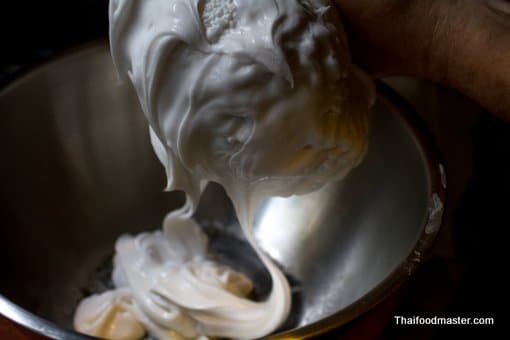
- Discard any gelatinized lumps that didn’t mix up in the beating stage. In Thai, this stage is called gaan graawng bpaaeng (การกรองแป้ง).
นำเศษแป้งสุกที่ไม่ผสมเข้ากันกับแป้งทิ้งออกไป วิธีการนี้เรียกว่า “การกรองแป้ง”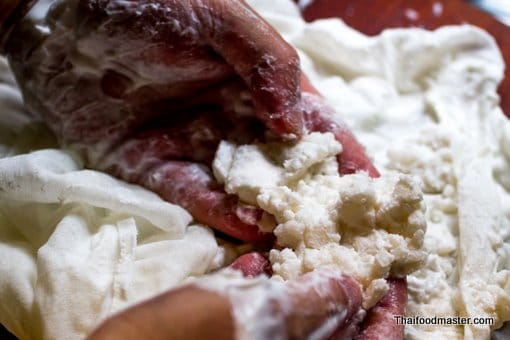
- Before using the cream, make sure that the top layer has not dried from the air; if so, mix it with a spoon. In Thai, this stage is called len bpaaeng (เล่นแป้ง).
ก่อนนำแป้งไปใช้ ตรวจสอบให้แน่ใจว่าผิวด้านบนของแป้งไม่แห้งและหากผิวแห้งใช้ช้อนผสมให้เข้ากัน ขั้นตอนนี้เรียกว่า “เล่นแป้ง”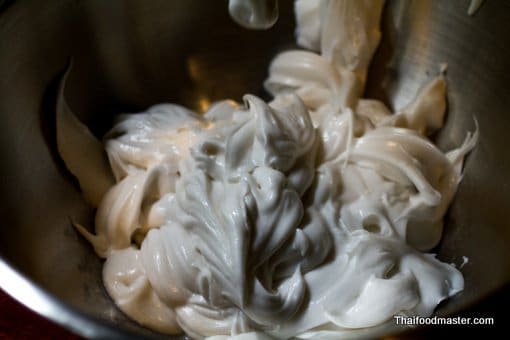
Extruding and Cooking the noodlesการบีบและการต้มเส้นขนมจีน
- Boil clean water in a large pot. When the water is at a hard boil, add cold water to moderate the boiling and reduce the amount of air bubbles that might damage the noodles.
ต้มน้ำสะอาดในหม้อใบใหญ่ เมื่อน้ำเดือดแล้วเติมน้ำเย็นเพื่อรักษาสมดุลของการเดือดและลดฟองอากาศที่อาจส่งผลเสียต่อเส้นขนมจีนได้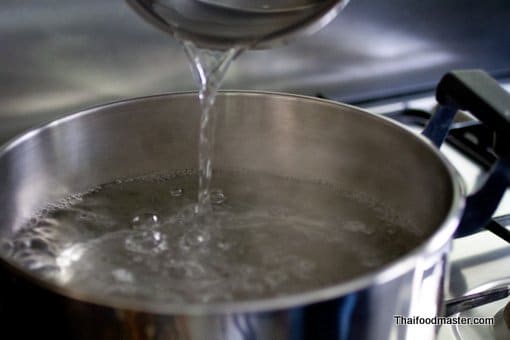
- With a ladle, mix the water quickly to create turbulence; this helps the noodles to spread evenly in the water and not stick to each other.
ใช้ช้อนคนน้ำอย่างรวดเร็วซึ่งจะช่วยให้เส้นขนมจีนกระจายตัวสม่ำเสมอกันและเส้นไม่ติดกัน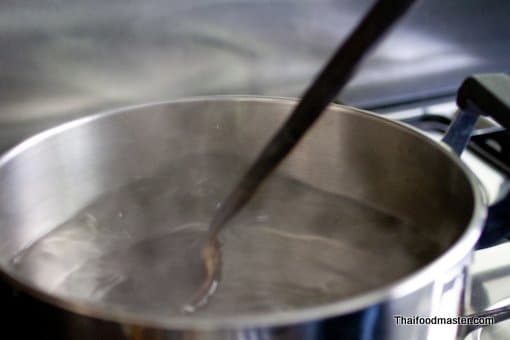
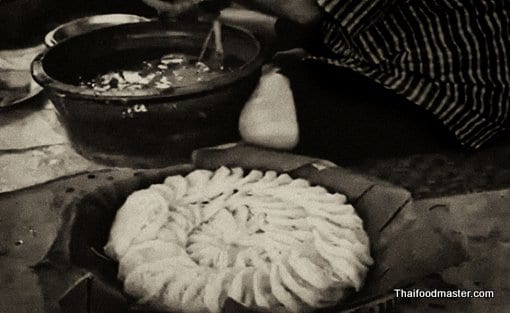
- Place the starch cream into an extruder, and press continuously, laying long noodles into the boiling water. Do it in batches. In Thai, this is called gaan beep khanohm jeen (การบีบขนมจีน) or gaan rooy khanohm jeen (การโรยขนมจีน).
วางครีมแป้งลงในที่บีบแป้ง จากนั้นบีบแป้งอย่างต่อเนื่องลงในน้ำเดือด ค่อยๆทาแป้งทีละก้อน วิธีการนี้เรียกว่า “การบีบขนมจีน” หรือ “การโรยขนมจีน”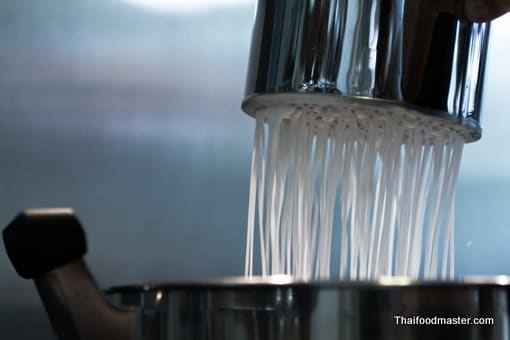
- When the noodles float it means they are ready: Scoop out the cooked noodles.
เมื่อเส้นลอยขึ้นแสดงว่าเส้นสุกแล้ว ตักเส้นขนมจีนที่สุกขึ้นจากหม้อ
- Transfer them into clean cold water.
นำเส้นใส่ในน้ำเย็นที่สะอาด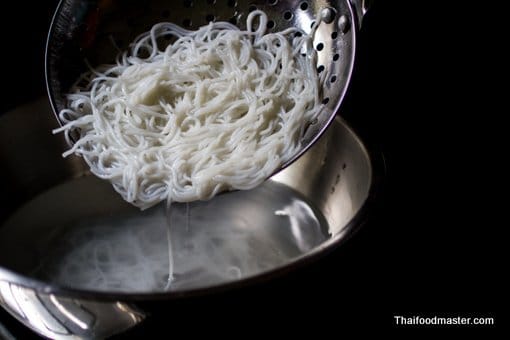
- Rinse three times.
ล้างเส้นขนมจีนสามครั้ง
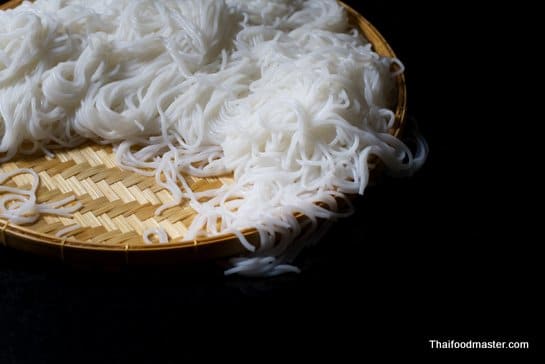
- With your fingers, grab a bunch of noodle strands, and roll it on your hand into a bundle, lightly pressing to squeeze off extra water. In Thai, this action is called gaan jap khanohm jeen (การจับขนมจีน).
ใช้นิ้วจับเส้นขนมจีนและค่อยๆบีบน้ำออก ขั้นตอนนี้เรียกว่า “การจับขนมจีน”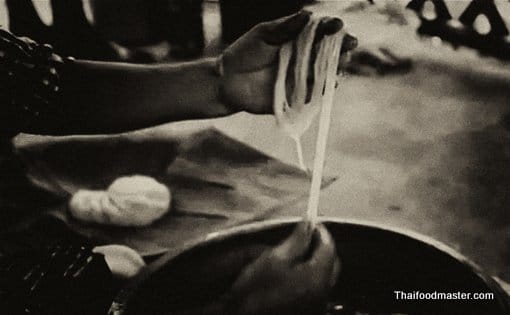
- You need practice to create good-looking noodles with the right consistency.
คุณต้องทำการฝึกฝนเพื่อให้ได้เส้นขนมจีนที่มีความเหนียวที่เหมาะสม
- Lay the cooked noodles on a tray, ready to sell, serve and eat.
วางจับขนมจีนลงบนถาด ตอนนี้เส้นขนมจีนของคุณพร้อมขาย เสิร์ฟและรับประทานแล้ว